Imagine having your dream home gym right in your house without spending a fortune. Does that sound too good to be true? Think again! With a little creativity and some basic DIY skills, you can build an impressive, functional gym that suits your fitness needs and stays within budget. DIY (Do It Yourself) approaches have surged in popularity, particularly among fitness enthusiasts looking to set up a dream home gym.
The benefits are clear: cost savings, customization, and a sense of accomplishment. Creating your gym equipment can be fun and rewarding, whether you’re a seasoned athlete or a fitness newbie. This article explores creativity and provides pointers on building your dream home gym with DIY equipment at an affordable cost. By the end of this read, you’ll have practical ideas and step-by-step instructions to start your DIY fitness journey.
What Are The Main Advantages Of Your Dream Home Gym Equipment?
- Cost Savings: One of the most significant benefits is the reduced cost. Commercial gym equipment can be pricey, but DIY solutions offer similar functionality at a fraction of the price.
- Customization: DIY projects allow you to customize equipment to your specific needs and preferences. You can modify dimensions, weight, and materials to fit your workout style.
- Sense of Accomplishment: Building your equipment brings a sense of pride and achievement. Knowing you’ve created something functional and beneficial for your health is rewarding.
Here’s An Overview of DIY Equipment Ideas For Your Dream Home Gym!
1. Sandbags
Sandbags are versatile for strength training, offering a range of exercises for various muscle groups.
Materials Needed:
- Sturdy duffel bags or military-grade sandbags
- Heavy-duty ziplock bags
- Sand or gravel
Instructions:
- Fill the ziplock bags with sand or gravel and seal them tightly.
- Place the filled ziplock bags inside the duffel bag.
- Secure the duffel bag using duct tape or zip ties to prevent leaks.
Safety Considerations:
Ensure the bags are double-sealed to avoid spillage during workouts.
2. Plyometric Boxes
Plyometric boxes are great for explosive training, improving strength and agility.
Materials Needed:
- Plywood sheets (¾ inch thick)
- Screws
- Wood glue
Instructions:
- Cut the plywood into panels according to the desired box dimensions (e.g., 20″x 24″ x 30″).
- Assemble the panels into a box shape using wood glue and screws.
- Sand the edges for a smooth finish.
Safety Considerations:
Ensure the box is sturdy and can support your weight. Test it cautiously before full use.
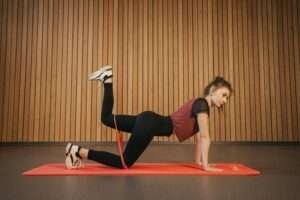
3. Resistance Bands
Resistance bands are excellent for strength and flexibility training.
Materials Needed:
- Durable elastic bands or old bicycle inner tubes
- Strong adhesive tape
Instructions:
- Cut the elastic bands or inner tubes to the desired length.
- Double them up for extra resistance if needed.
- Secure the ends with adhesive tape to create loops.
Safety Considerations:
Check for wear and tear regularly to avoid snapping during use.
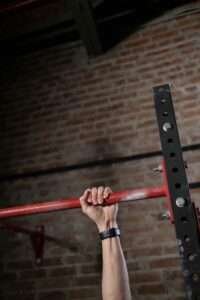
4. Pull-Up Bar
A pull-up bar is essential for upper-body workouts.
Materials Needed:
- Metal pipes or sturdy wooden beams
- Wall brackets
- Screws and anchors
Instructions:
- Secure the wall brackets at the desired height.
- Attach the metal pipe or wooden beam to the brackets.
- Ensure it is firmly fixed to support your weight.
Safety Considerations:
Test the bar with light pressure before using it fully.
5. Weight Plates
Weight plates can be made using repurposed materials or concrete molds.
Materials Needed:
- Concrete mix
- Plastic buckets or moulds
- PVC pipes for handles
Instructions:
- Mix the concrete according to package instructions.
- Pour the concrete into the moulds, placing the PVC pipe in the centre for the handle.
- Allow it to cure fully before use.
Safety Considerations:
Ensure the weight is evenly distributed, and the concrete is fully set.
6. Medicine Ball
Medicine balls are versatile for various strength and conditioning exercises.
Materials Needed:
- Old basketball or fabric bag
- Sand or rice
- Duct tape
Instructions:
- Cut a small opening in the basketball or fabric bag.
- Fill it with sand or rice.
- Seal the opening securely with duct tape.
Safety Considerations:
Ensure the ball is well-sealed to prevent leaks.
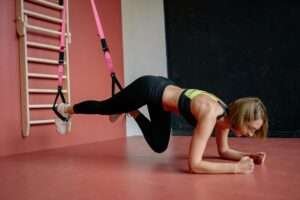
7. Suspension Trainer
A suspension trainer is useful for bodyweight exercises targeting strength and stability.
Materials Needed:
- Nylon straps
- Handles (e.g., PVC pipes or old broom handles)
- Carabiners
Instructions:
- Attach the handles to the nylon straps.
- Secure the straps with carabiners to a sturdy anchor point, like a door frame or ceiling hook.
- Adjust the straps to the desired length.
Safety Considerations:
Ensure all connections are secure and test with caution.
Takeaways:
Start with one or two DIY projects, then slowly increase your collection and set it up at home for exercise. You don’t need to hurry; rather, take pleasure in each step while making necessary changes based on personal preferences later on during this process of finding the most suitable thing for yourself. Hence, create and use self-made fitness machines because they enable individuals to take charge of their wellness journey in an imaginative manner, which is resourceful, too.
Have a do-it-yourself mentality and relish crafting a gym within the limits imposed by your financial plan – this could be the best thing ever!


1 Comment
I don’t think the title of your article matches the content lol. Just kidding, mainly because I had some doubts after reading the article.